Repotting Rubber Plants (Ficus Elastica): The Soil to Use and How to Do It
Here’s all about repotting Rubber Plants including the preferred soil mix, how to do it, plus the aftercare.
Rubber Plants are almost foolproof if you’re in the market for a large indoor plant. They grow fast (quicker than most houseplants) and thrive in bright light. Because of their vigorous growth rate, yours will need a larger pot at least once.
All of this you read here applies to all Rubber Plant varieties, whether the foliage is solid or variegated.
Ficus elastica is their botanical name. Besides Rubber Plant, other common names they’re called are Rubber Tree, Rubber Fig, and India Rubber Tree. They grow outdoors year-round in temperate climates and can reach 80-100′ in nature. This is about repotting Rubber Plants in pots as indoor plants.
HEAD’S UP: I’ve done this general guide to repotting plants geared for beginning gardeners which you’ll find helpful.
Some Of Our General Houseplant Guides For Your Reference:
- Guide To Watering Indoor Plants
- 3 Ways To Successfully Fertilize Indoor Plants
- How to Clean Houseplants
- Winter Houseplant Care Guide
- Plant Humidity: How I Increase Humidity For Houseplants
- Buying Houseplants: 14 Tips For Indoor Gardening Newbies
- 11 Pet-Friendly Houseplants

Me surrounded by Ficus elastica Rubys in a grower’s greenhouse.
The roots of a Ficus elastica are extensive and grow as fast as the plant grows tall. Outdoors they can be considered to be invasive because as they grow tall and wide, so do the roots. Although they’re beautiful specimen trees, they can tear up sidewalks and foundations and get into sewer lines.
No worries when it comes to growing 1 indoors though. They generally max out at around 10′ in our homes and the pot will constrain their growth. As yours grows taller and wider, it’ll need a larger pot in proportion to the size of the plant.
What is the Best Time for Repotting Rubber Plants?
Late winter (in temperate climates), spring & early summer. When it is will depend on your climate zone. The colder your climate, the later the repotting.
I repotted my small Variegated Rubber Tree in April. The 2 larger ones were done in mid-October. Not the optimum time (life “stuff” got in the way!) but it’s still warm here with lots of sun in Tucson so they’ll settle in fine before winter.
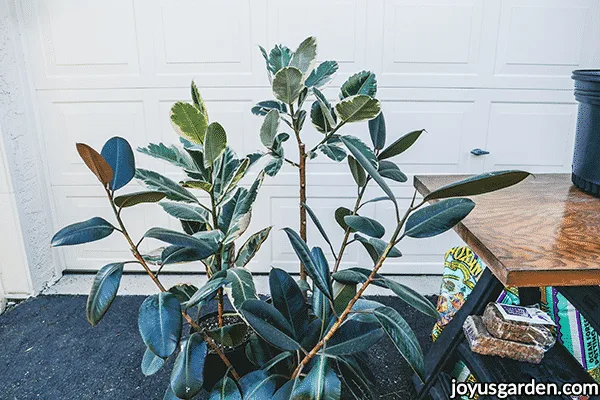
My trio of Rubber Plants. The smaller variegated on to the left is an air layering of the 1 to the right.
Does a Rubber Plant-like to Grow Potbound?
This goes hand in hand with how Rubber Plants grow fast. They can grow slightly potbound but because they’re trees, prefer & a large base to accommodate the roots.
If yours gets too tight in its pot, it’ll have a hard time taking up water & nutrients. This will cause stress & poor growth.
I repotted my 2 larger ones because the soil was pulling away from the sides of the pot. In the warm months, I was watering them every 6-7 days & the larger soil mass will cut down on the watering frequency.
How Often Do I Need to Repot a Rubber Plant?
Rubber Plants are moderate to fast growers. It depends on how yours is doing, what conditions it’s growing in & what the pot size is.
My 2 larger ones are in good-sized pots so they shouldn’t need repotting for at least 3 years. The smaller 1 might need repotting in 2 years. We’ll see!
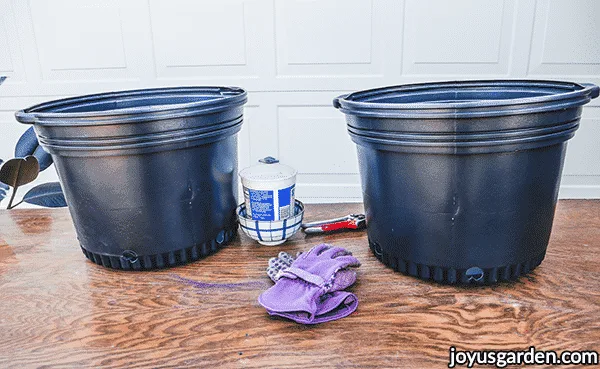
The 2 grow pots my large Rubber Trees went into.
What Size Pot does a Rubber Plant Need?
You need 1 to accommodate its size. They’re trees & prefer to not grow tight in their pots. Give their roots plenty of room to grow. Besides, you don’t want to be repotting it every year.
I like to keep they pot relative to the size of the plant. My smaller Variegated Rubber Plant would have looked out of scale in 1 of those big pots.
The size pots I used:
My smaller 1 went from a 1-gallon pot to a 3-gallon pot.
The 2 larger went from 10″ pots to ones that are 16″ wide (17.5″ with the handles) x 12″ deep. I went up quite a few pots sizes & now the roots have plenty of room to grow. The pots have 6 drain holes on the sides as well as 1 in the bottom ensuring good drainage. I purchased these 2 larger pots online at the Greenhouse Megastore by the way.
Note: I repotted my 2 larger Rubber Plants into pots which are notably larger than those they’d been growing in. With this much soil mass in a pot, you have to be careful not to keep it too wet. I’m careful to water around the root balls only; that way all the soil isn’t soaked. As the plants grow & the roots fill in the pots, I’ll begin to water the the entire mass.
What Are the Roots Growing Above the Soil?
Those are the aerial roots that help to anchor the Rubber Tree as it gets taller & wider when growing in nature.
I cut them off before repotting my Variegata standard which you’ll see in the video. Rubber Plants don’t need these above-ground roots when growing indoors.
The roots do emit sap just like other parts of this plant. It can be irritating to some of us humans as well as pets. Be sure to keep it away from your face & wear gloves & long sleeves when pruning or handling a Rubber Plant if you think it’ll affect you.
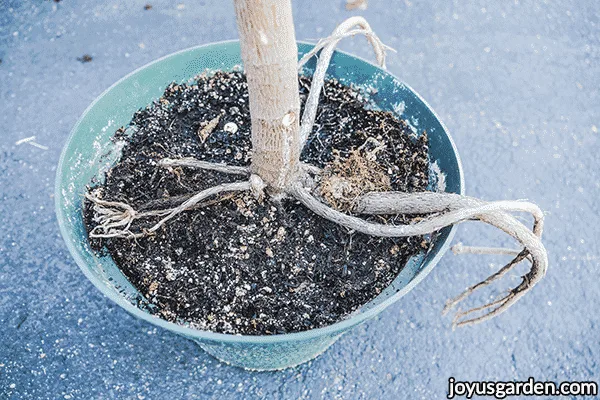
You can really get an idea of what those aerial roots look like here.
What Type of Soil Does a Rubber Plant Need?
A good quality peat-based mix that drains well & provides plenty of aeration. I used:
- 3/4 Smart Naturals organic potting soil. I’m partial to this 1 because of its high-quality ingredients. It’s a soilless potting mix & is enriched with lots of good stuff but also drains well.
- 1/4 coco chips & pumice. These ingredients up the ante on the drainage factor & help to prevent root rot.
- I also threw in a few handfuls of coco fiber. Yours probably won’t need this but I’m in Tucson with year-round sun & desert summers. Coco fiber is an environmentally friendly alternative to peat moss & Rubber Plants love it. Just know it retains moisture, so if you add it, reduce the watering accordingly.
- In spring I’ll give them a topdressing of worm compost & compost. Here’s why I like & how I use this combo.
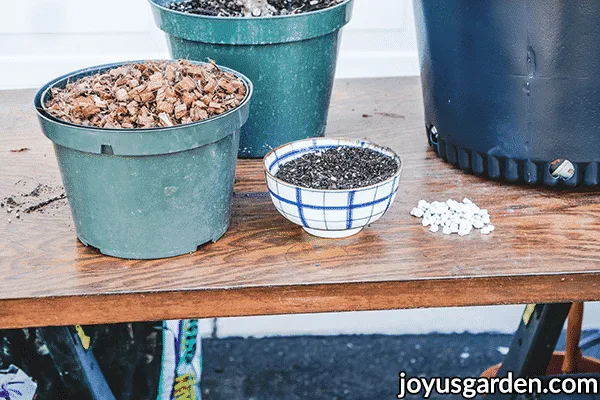
The coco chips, potting soil & pumice.
- I do a lot of planting & repotting & have a garage to store all my potting materials. Here are 2 simpler mix options for you:
- 3/4 potting soil, 1/4 pumice or perlite.
- 3/4 potting soil, 1/4 cactus & succulent mix. I now make my own s & c mix but recommend any of the mixes listed right below if you can’t find 1 locally or don’t want to make your own.
- A few online options for buying succulent & cactus mix: Bonsai Jack (this 1 is very gritty; great for those prone to overwatering!), Hoffman’s (this is more cost-effective if you have a lot of succulents but you might have to add pumice or perlite), or Superfly Bonsai.
How Much Potting Soil I Used:
Here is the amount of potting soil used for repotting my 2 larger plants.
Just to give you an idea of how much I used: a 1.5 cubic foot bag for the 2 larger grow pots, give or take a bit. How much you’ll need will depend on the size of the rootball & what other ingredients you add-in.
How Do You Repot a Rubber Plant?
It’s best to watch the video above for this. Here’s a summary of the steps:
- Water your Rubber Plant 1-3 days before. You don’t want to repot a dry, stressed plant.
- Gather your materials & have them close by. Because the pots were large, I mixed the ingredients as I went along.
- Remove the plant from its pot. Both of mine easily came out but that’s not always the case. You may have to squeeze the pot or run a knife along the edge if need be.
- Fill the pot with mix so that the root ball sits about 1/2″ below the rim. The mix will sink over time but you want to leave space so the mix doesn’t spill out when watering. If it was spring or summer, I would have left more room to top dress with worm compost & compost.
- Place the Rubber Plant in its new pot. Gently massage the root ball to loosen the roots a bit so they can easily grow into the new mix.
- Fill in with the mix. Lightly press the mix to stabilize the root ball making sure the plant is straight. Add more mix if necessary.
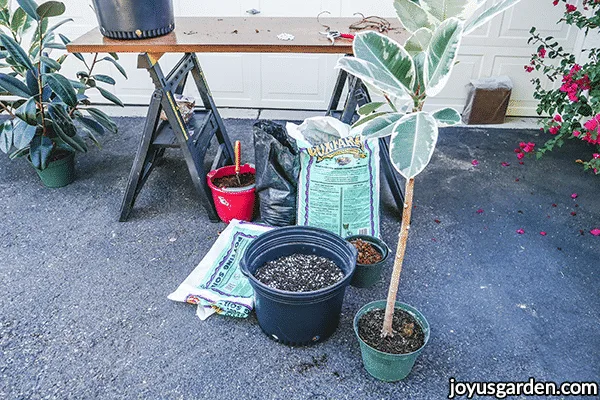
My Variegated Rubber Plant standard (tree form) ready to go into its new pot. You can see its cut off aerial roots on the table right behind my favorite Felco pruners on my work table.
Care After Repotting Rubber Plants
It’s simple. Water your Rubber Plant well after the repotting/transplanting. Don’t let it completely dry out while it’s setting in. How often you’ll water yours depends on these factors: the mix, the size of the pot, & the conditions it’s growing in.
I’ll probably water mine again in 3 weeks as it’s now the end of October. I’ll see how fast they’re drying out in the new mix & at this time of year.
A Guide to Watering Indoor Plants
A tip for repotting large Rubber Plants:
This helps if you’re planting a Rubber Plant that’s tall &/or wide & also has a lot of foliage. I did this once and it really did the trick. Loosely tie the plant up and wrap a sheet around it. This makes it easier to handle for the repotting and also helps prevent the leaves from breaking. Because when they do, the sap flows out & it’s messy (not to mention the possible irritation).
Rubber Plants are great indoor plants because of their ease of care. They’re much less fussy than their Ficus benjamina and Ficus lyrata cousins. I have 3 of them and they all do well even here in the dry ole desert.
If you have a Rubber Plant and it’s happily growing, then you’ll have to repot it at some point. Hope this helps!
Happy gardening,

P.S. Here is additional information on caring for Rubber Plants!

HELP! I have a Very Large rubber tree,it has been in same Big pot over 20years and is so large it no longer will fit through my sliding glass door opening! I have no idea what to do, any advice would be greatly appreciated! After this long I dont want to kill it, Thanks!
Alan – It sounds like it needs to be repotted & this is a great time of year to do it. Follow the steps in this post. You may need to gently tie the plant up with a sheet &/or some twine to make the repotting process easier. Be sure to get a pot large enough becue this plant needs roo for the roots to spread. Nell
Hi Nell,
Thank you for all of this – it is so informative and helpful!
I just have a quick question about the aerial roots – is it ok to cover them with soil or is it better to just cut them off when repotting?
All the best,
Mila
Hi Mila – You’re welcome! As houseplants, they don’t need the aerial roots. I cut off the dried up & larger ones. Smaller ones I cover a bit as long as the soil doesn’t go too much higher than the root ball on the trunk. Nell
Hi Nell,
I am on my second rubber plant since I’ve moved into my home 1.5 years ago and it’s not doing well. It seems that as soon as winter hits…it starts to die off ( I live in Canada). Half of my current plant has already died off and I’ve tried moving it (it’s not large)… I’m watering minimally but it seems the other half died due to root rot. I don’t know what to do as I think it’s such a beautiful plant but they keep dying on me .
Hi Solange – It sounds like it may not be getting enough light. When the plant isn’t getting enough light, the soil isn’t drying out. Try moving it to a spot with bright natural light. It could also be that the soil mix is too heavy, preventing drainage & proper aeration. Nell