Potting Up My Pencil Cactus Cuttings
I loved my 8′ Pencil Cactus and had it for a very long time. It was a cutting that I took in San Francisco and it traveled with me when I moved to Santa Barbara. I 1st laid eyes on it when I was installing the Macy’s Spring Flower in the late 80’s and it was part of 1 of the window displays. Succulents were very exotic back then and I had to have it! I just moved to Tucson and couldn’t take the plant (see the pic below to discover why) so I took a few cuttings. Today I want to share with you how easy it is to pot up and propagate Pencil Cactus cuttings.
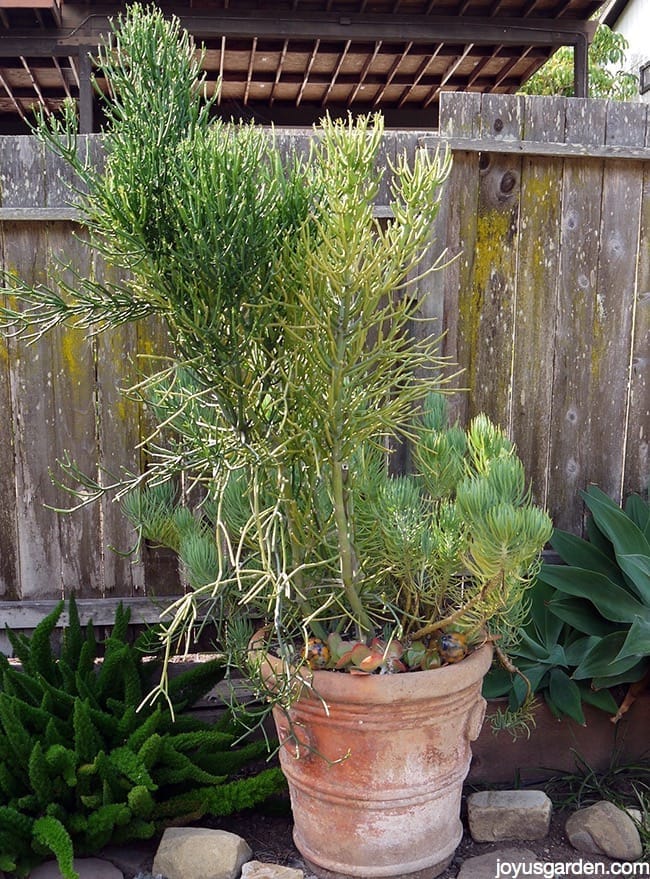
This is the mother plant from which I took the cuttings. The plant in itself is very heavy but then you add in the large terra cotta pot & all the soil & there was no way it was moving anywhere.
I took the cuttings on May 28 which was the day before I left Santa Barbara and wrapped the angled ends in a rag and covered it with a plastic bag for transport. When cut Pencil Cacti (and many other euphorbias) bleed like crazy and continue to do so for a while so heads up to that. The 9 hour drive to Arizona was a bit tough because my car was packed to the gills with plants, pots, succulent cuttings and a couple of kitties. Needless to say, the cuttings got beat up before they even reached their new home.
I ended up putting all the cuttings under a cypress tree in a shady spot in my garden. The temperatures were consistently in the triple digits and these cuttings were looking a little bit sad so I decided to pot them up on June 29. The crazy monsoon rains had arrived so the cuttings had gone from experiencing high heat and dryness to pounding rains and a bit of humidity. Besides, I was leaving for a week in San Francisco the next day and wanted to take off knowing my Pencil Cactus cuttings were happily planted up and on their way to rooting in.
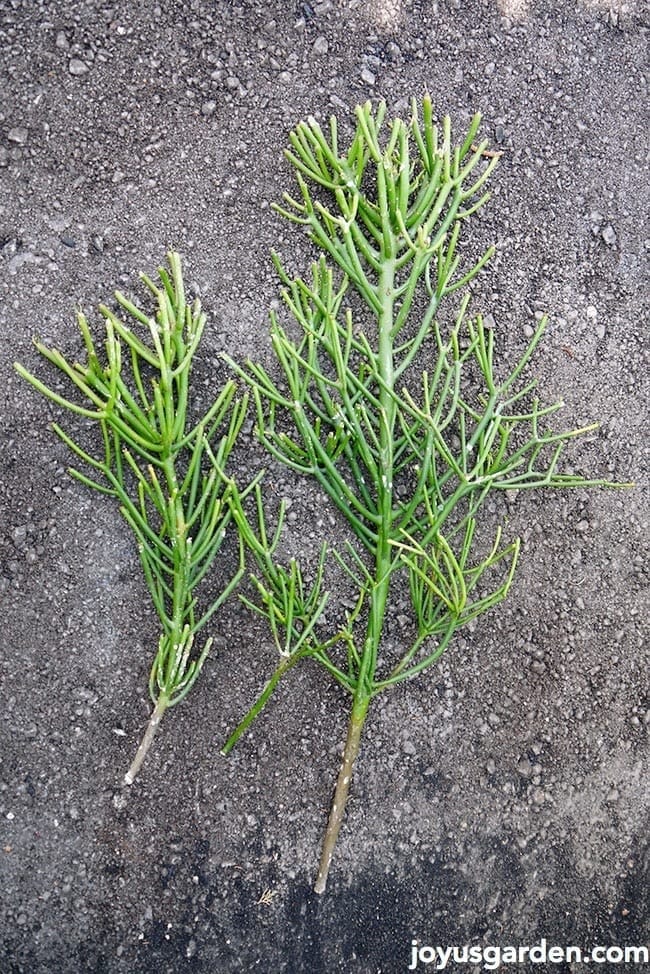
Here are the 3 Pencil Cactus cuttings waiting to be potted up. 1 is almost 3′ tall, the other 2′ tall & the smallest is about 1′. The white marks that you see on them are bits of dried up milky sap along with some scarring. I want you to know that large Pencil Cactus cuttings will propagate just easy as smaller ones do. I’ve propagated the individual branches with great success by the way.
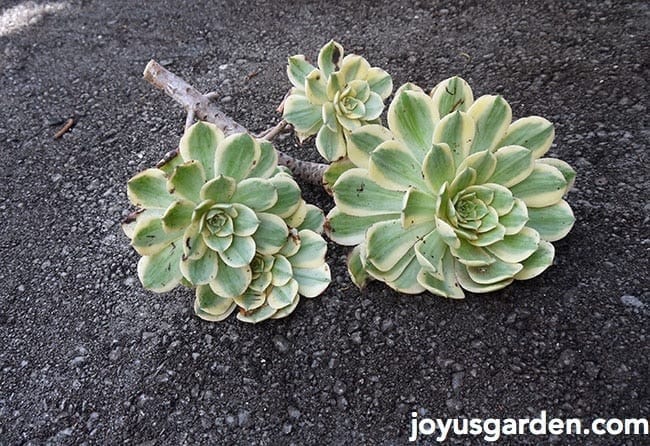
Growing aeoniums is a crap shoot here in the desert because most are native to the Canary Islands where the average temp is 71 degrees all year long. I decided to take a cutting of my beloved Aeonium Sunburst & give it a go. It needed potting up too so into the pot it went too.
This pot is just a temporary home for the Pencil Cactus and Aeonium Sunburst cuttings until next spring. I need to figure out how many pots I actually want here in my new garden and go from there. I want to take my time and find ones I really want rather than just buying any ole pots I see. Hopefully by March I’ll have that all figured out!
Potting up these cuttings is so easy. Here’s what I did:
-I put newspaper over the drains holes so any of the light weight potting mix wouldn’t wash out with the 1st few waterings.
-I filled the pot halfway with succulent & cactus mix & then sprinkled in about 1/4 cup of worm castings on top of that. This is my favorite amendment for succulents by the way.
-I positioned in the largest Pencil Cactus cutting & added some more mix. You don’t want to plant succulent cuttings too deep by the way. Then I added the 2nd cutting along with the Aeonium Sunburst cutting & filled the pot with more mix to about to about 2″ below the rim. Of course more worm castings were added in too.
-These cuttings are fairly heavy. I didn’t bring any stakes with me from Cali & couldn’t find any laying around here so I had to improvise (you know how that goes!) with a couple of pieces of cut up house trim that I found in the garage. The aeonium rests just fine against the inside of the pot but the 2 larger Pencil Cactus cuttings needed staking to stay upright in the light mix. I added in the small PC cutting at the end.
I put the planted cuttings in a spot right outside my kitchen which gets a bit of early morning sun but is bright all day. This way the cuttings can settle in without burning in the hot Tucson summer sun. I usually let succulent cuttings stay dry for a few days after planting them but decided to soak these right away. The Pencil Cactus can take the full sun but the aeonium can’t so the pot will stay in this location until they go their separate ways in my garden.
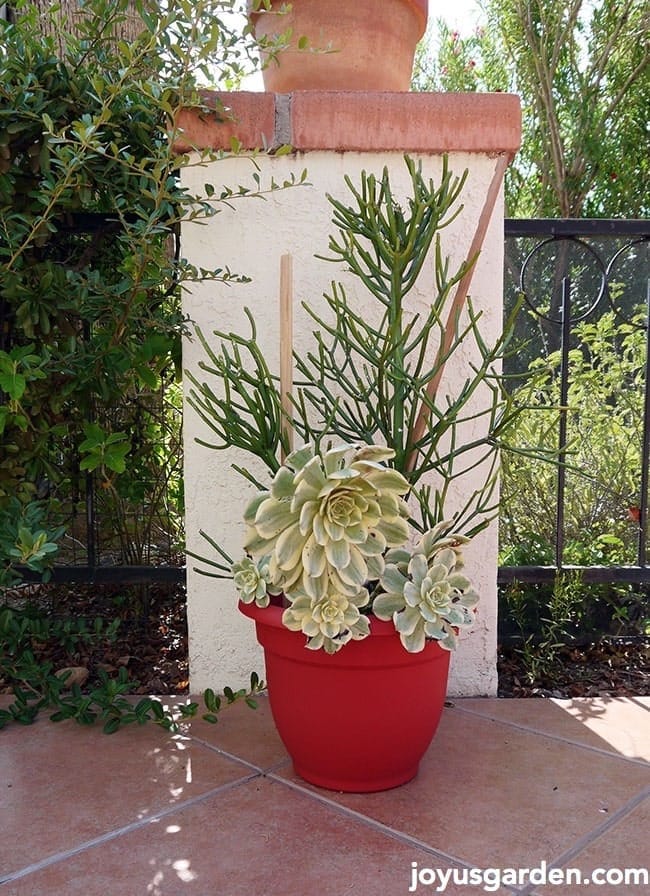
This is how the cuttings look 8 days after they were planted. They’ve definitely perked up & the Pencil Cactus is even putting out a little foliage.
You can see how resilient these cuttings really are because they survived the move and a total change in climate. The Aeonium Sunburst will need to be covered at times this winter to protect it from freezes. It will probably eventually become a winter houseplant. The Pencil Cactus is right on the edge in terms of cold hardiness here in Arizona’s intermediate desert but should be fine in a pot up against the house.
Here’s 1 thing you can be sure of: if you have 1 Pencil Cactus cutting then over time you’ll have many!
Happy gardening,

YOU MAY ALSO ENJOY:
How Much Sun Do Succulents Need?
How Often Should You Water Succulents?
Succulent and Cactus Soil Mix for Pots

